This month's inspiration challenge photo
My take on the inspiration photo (This is a 6 x6 box card. In the photo above it is closed up with a belly band). To follow along and join the hop challenge, click the link below:
Here is the front of the card with the belly band off
Here's the inside
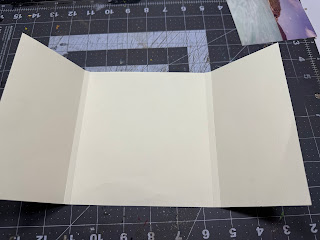
This card brought back all the memories of when we used to go on vacation-yes used too :( So, I went all out to smash my stash of beachy goodies I haven't used in years! The card base is cut from a sheet of 12" x12" vanilla cardstock. It is cut to 6" x 12". It is scored vertically at 3", 3 1/4", 8 3/4" and 9".
I used a light brown ink to ink up the quarter inch sections because I wasn't going to put cardstock over these. Altenew Fresh Dye ink in Pink Sand was the perfect beachy color.
Next, from a sheet of 12"x 12" scrapbook paper I cut it in half at 6" horizontally and cut one of those pieces in half at 6" so I had two 6" squares. I then cut each square vertically in half at 3". This was to make sure the pattern of the paper stayed consistent across the face and inside of the card.
Next, in my stash of beachy goodies I had the perfect photo to use as the focal point of the card. I did a dry fit with it first, then attached it with liquid glue. I then attached the decorative scrapbook paper to the inside and outside of the card opening panels.
(Pro tip: when attaching paper over flaps, tags, etc... apply the glue to the flap, tag, etc... and then lay your pre-cut panels and papers onto the glued area. This way, if you have any trimming of the decorative paper to do, the parts hanging over the edges won't be all gloppy from glue.)
With the big stuff done, it was time to play!
I cut a piece of brown cardstock scrap to fill in under the photo as sand. I used a cruise ship sticker, sticking it directly to the photo. I then layered over where the photo ended with a strip sticker of waves and beachy "sand." And of course, I added palm trees and other fun beachy element stickers.
Next was to make the belly band. Pro Tip: when making a belly band, I use strips cut from 12"x12" cardstock or scrapbook paper. I lay this strip on my table surface, upside down, and center my card on it. I then hand bend the strip around the card and press the folds softly-I do not use a bone folder to burnish the fold lines on a belly band. You want a belly band to be springy enough to get over whatever goodies you are piling up on the card front, and soft folded edges will give them that bounce.
Then I wrapped it around my card again and glued it in the center and attached all the fun embellishments.
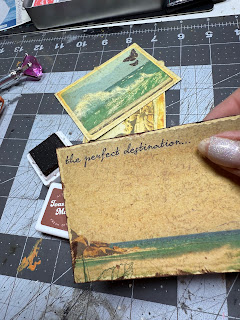
The final step was to decorate the front flaps of the card. I had some fun ephemera that looked like vintage postcards, so I had the idea to attach them like old steamer trunk travel stickers. I edged them each first, then applied liquid glue to the backs of them. I attached them to the flaps on diagonals for visual interest and where they hung over the edge, I trimmed that off.
(Pro Tip: notice how I slipped a scrap piece of paper under the front flap as I attached the postcards. this way I won't get glue onto the inside main part of the card.)
I just love how this came together!
I hope you have been inspired to hop along with the challenge and try your take on this month's inspiration photo! Remember, if you do, tag me @scrappystampthefunup I would love to see your work! See you next month!


.jpeg)


.jpeg)


Isn't it fun to shop the stash and discover all sorts of cool stuff? Thanks for your amazing team project for the Inspiration Station Challenge!
ReplyDeleteDonna xx