Tuesday, September 17, 2013
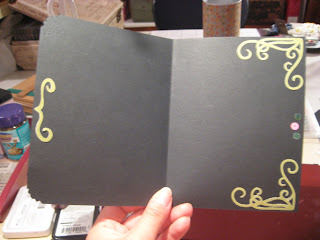
Ok, finally, I am finally going to finally unveil my line of cards featuring images from passionfruitimages.com I love their tarot card images...all cards of the major arcana are represented in ancient detail and in what looks to me like French script. For us pagans, we know that the major arcana in the tarot represent aspects in life we cannot avoid: I call them the fate cards because when they appear, you need to stop, take head, understand and learn how to move on, etc....so, it has been my personal challenge and dream to develop a line of cards by a pagan and for pagans. I tried to keep these simple in construction, but each one features three cards that when read together will give the recipient insight into your meaning behind the cards. Also, the colors and embellishments coincide with the tarot message as well. enjoy! tell your friends!
Wednesday, September 11, 2013
Hello scrap peeps! Finally done sewing for vintage base ball, and I am proud to say my woman's team was 2 and 0 at the Ohio Cup tournament so yeay!!! Now I am trying to rebuild my card stash so I don't have to be interrupted in the middle of scrapbooking to throw a card together at the last minute. Here's my method for mass producing awesome cards in a hurry.
Gather your supplies:
Card forms, corner rounders, sentiments, a few blings, some random decoupage images/die cuts and decorative frames.
Take a pad of ugly double sided papers. Yes, you know you have ugly double sided papers-the stack that was to ugly to do anything with but to good a clearance deal to pass up ;) Cut your card forms (I base mine on the envelope I cut with my cricut so it's roughly a 6.5x5 inch card. Easily goes thru the mail with one stamp if you keep the embellishments to a minimum-which you want to do for mass production.
So, cut all your card forms (and now would be a wise time to sign the back). Pile them up and corner round them. I use a bunch of different styles. Next layout the decorative framings-I use my Spellbinder nestabilities for these and attach the with spray adhesive so there is no glue gushing out from the details. Add your images/die cuts inside the frames-glue stick is fine for these unless they have lots of scrolls-sometimes I use my xyron sticker maker. Stick on the sentiments-these can have a tendancy to blend into the background so once they are placed I run a thin edge of metallic marker around them. On these I used copper for the aged look. Add a bling dot on the sentiment and poof, you are done.
Simple right? Well....here's your tip for the day: to really give them some artistic "pop", pair black and white or sepia and cream images with wildly bold card forms and neutral frames or monochromatic card forms and bright glittery frames. The neutrals pull the contrast together easily and will look like you needed a degree in fine art to do these cards. And of course add party hats! If you want to see how to make the party hats, send me a message :)
Have fun!
xox
Subscribe to:
Comments (Atom)


